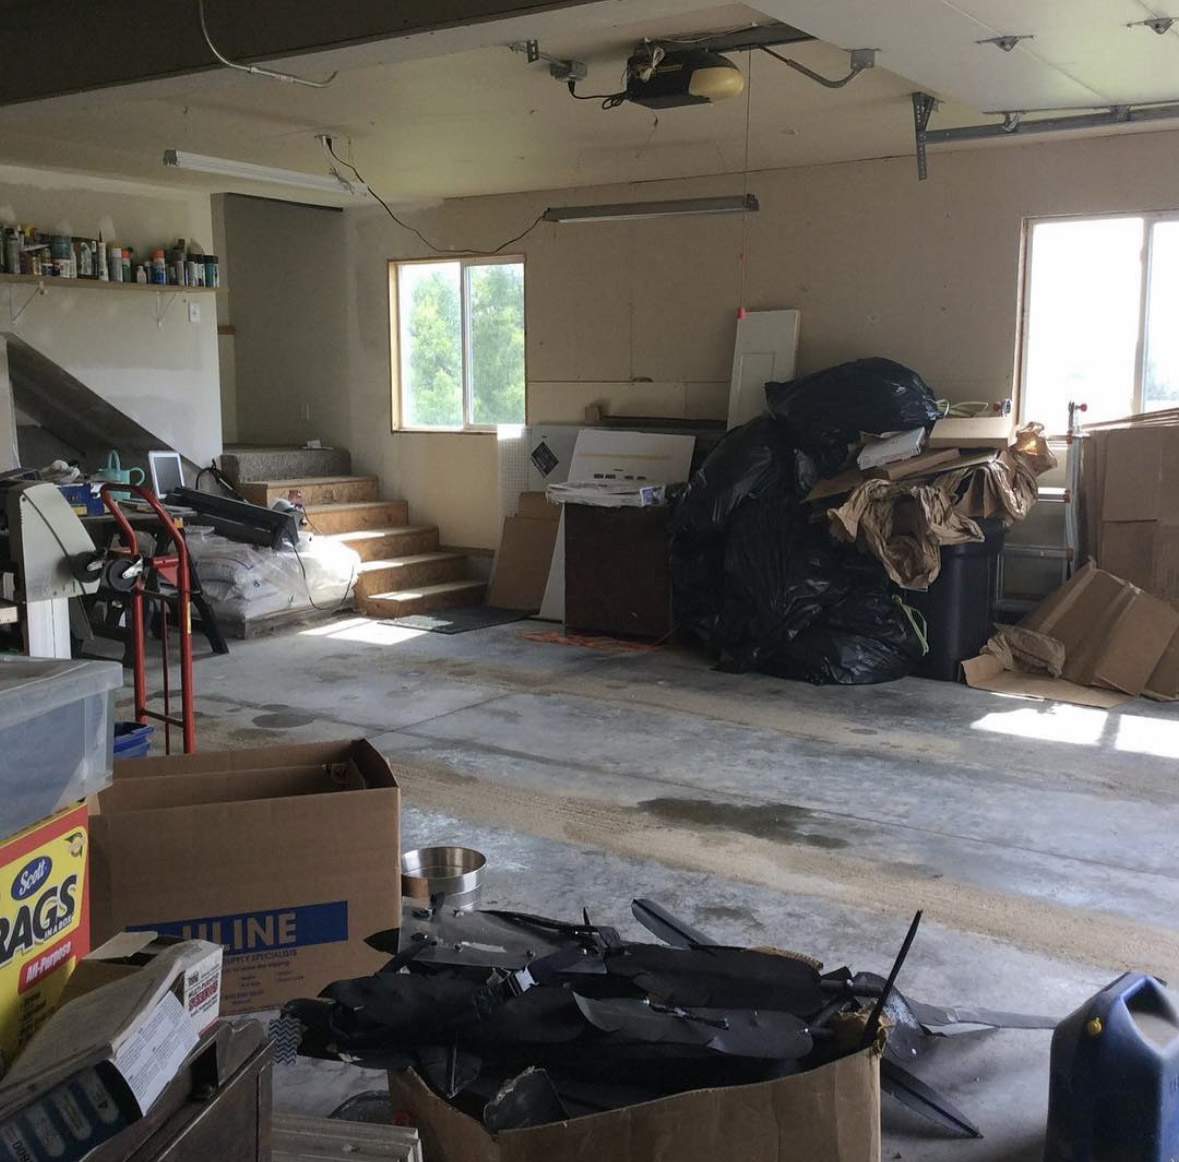
Let me paint you a picture. Five years of accumulated garage junk. No heat. A space that had given up on itself long before we moved in. But somewhere underneath all of it, I could see my studio. The place where I'd finally have room to think and create. So we got to work.
First Things First: Heat
We live in Wisconsin. Heating a workspace isn't optional, it's a survival strategy. Our house had a garage connected to the main space by a hallway, with an unheated room above it that already housed Stephen Edward Graphics, our vinyl decal business. We'd been heating that upper space with a pellet stove. It worked, technically. But when we decided the garage was becoming my glass studio, we committed properly. We installed a furnace with ductwork that serves both levels, and that one decision transformed the whole project. Suddenly it felt like a real place where a person could actually create something.
Good heat is honestly the most romantic thing you can do for a creative space.
Letting in the Light
I knew from the start that I needed a big window. We live out in the country, and the backyard view is trees and open sky. I wasn't going to waste that. We drywalled in the old garage door openings, and I planned a large picture window to go in the center of the wall that faces the backyard. A beautiful unobstructed view of the trees and sky. It also became my favorite spot for photographing finished pieces. Instead of trying to dodge my neighbor mowing his lawn shirtless. Lol.
We also added a ton of ceiling can lights throughout so the space is lit up on the darker winter days too.
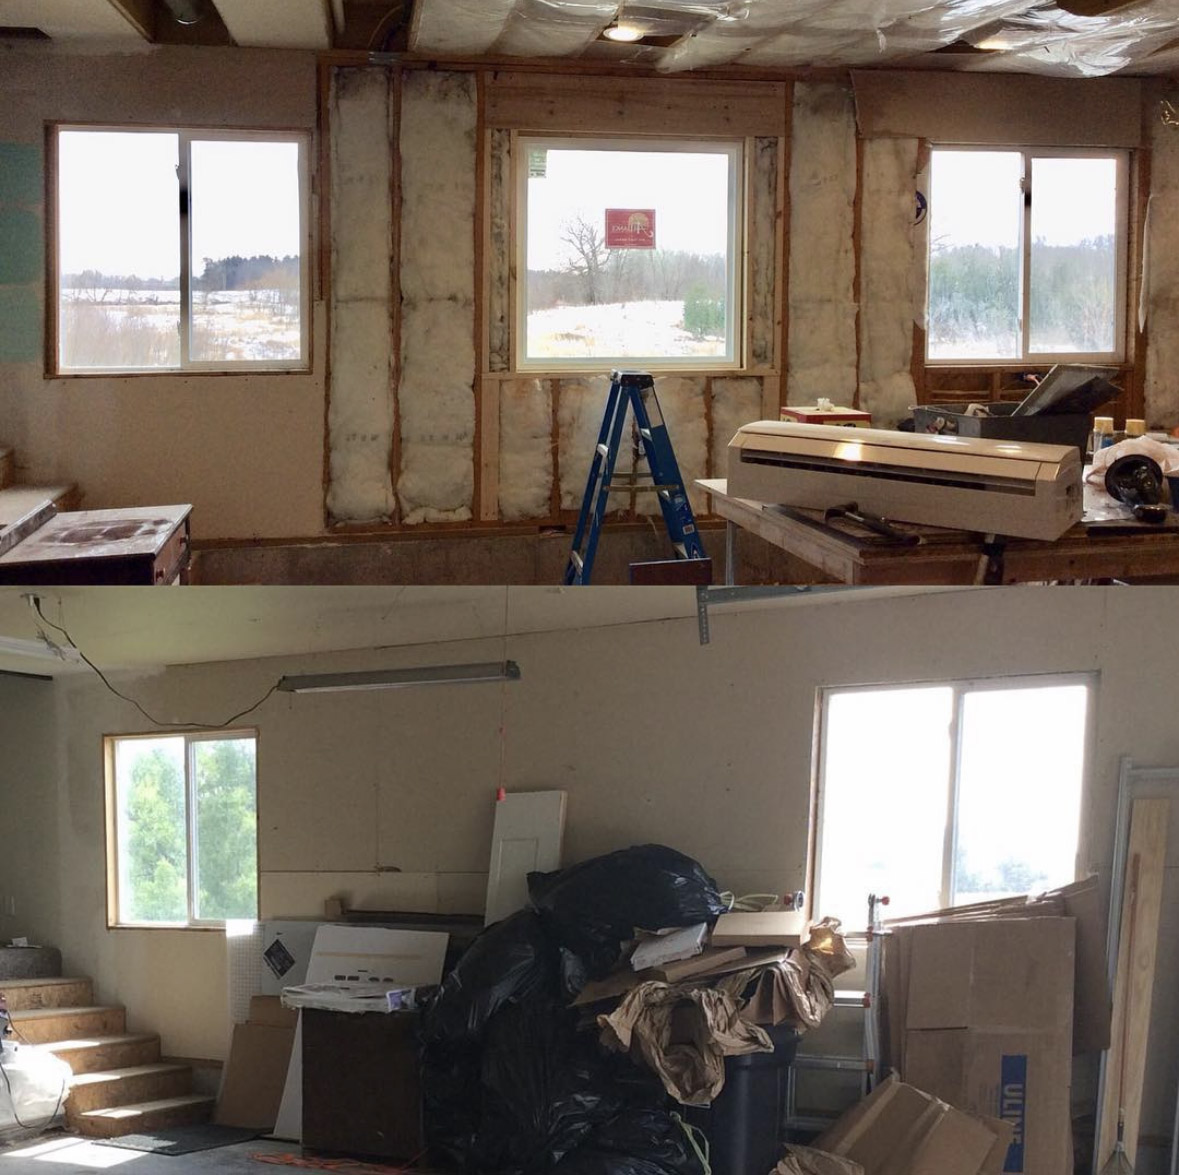
Top: the new picture window, bright and open. Bottom: the same wall before, darker without all that light coming in.
The Wiring and the Kilns
Glass fusing kilns are not gentle on an electrical panel. We added new wiring with dedicated circuits so I could actually run my equipment without anxiety. I had to convince the electrician that, yes, I do run all three kilns at the same time, so I do need each one on a different circuit. This is the unglamorous part of a studio build, but if you skip it, you'll regret it.
The Storage That Came With History
Some of the best features in this studio weren't purchased. They came with me. My glass storage shelves were built by my dad for our previous house. I asked for curved dividers so it would be easier on my hands and fingers when I pull out sheets of glass. He made a jig so he could easily cut out the curve for each divider. For this new space I updated them by adding wainscoting and painting the edges. The bones are his and the fancy new touches are mine. I love that.
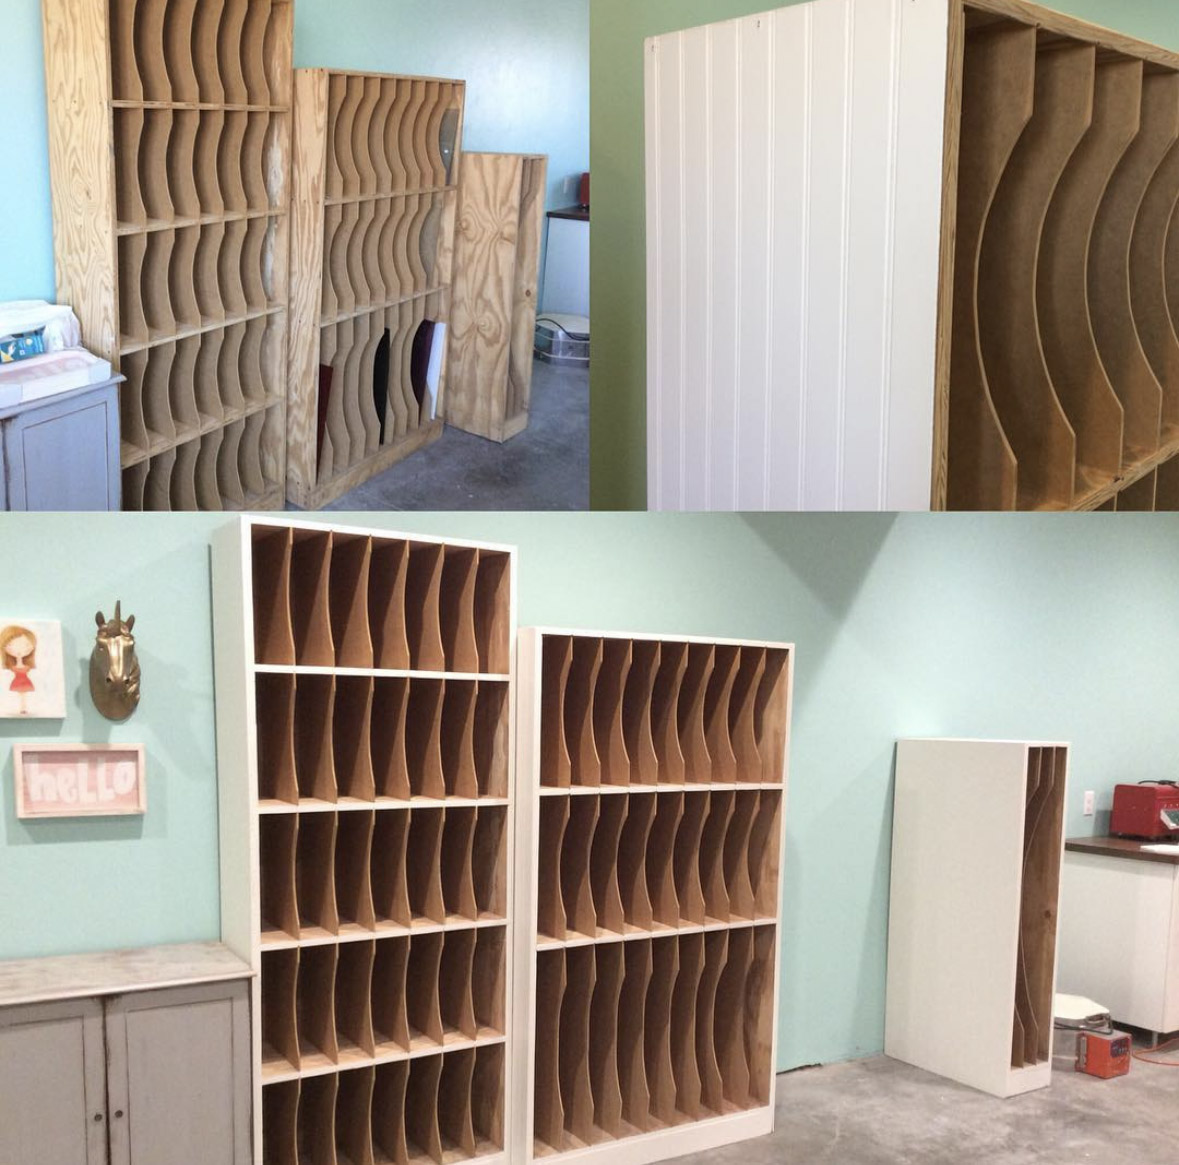
Before and after. The original plywood shelves my dad built, and then updated with wainscoting and a cream painted finish. The bones are his, the glow-up is mine.
Then there's my absolute favorite thing in the entire studio: IKEA Trofast shelving with bins. Technically designed for children's toys. I found out about them more than a decade ago because a customer came to Stephen Edward Graphics wanting decals to label her bins. She was sorting Legos by color. I remember reading that and thinking, wait. Glass scrap. That's exactly what I need this for.
Now I have a whole system of bins sorting my glass scrap by color, with custom decals to label each one. A solution that came from a customer, got filtered through a glass artist's brain, and now sits beneath my table as one of the best things in my studio.
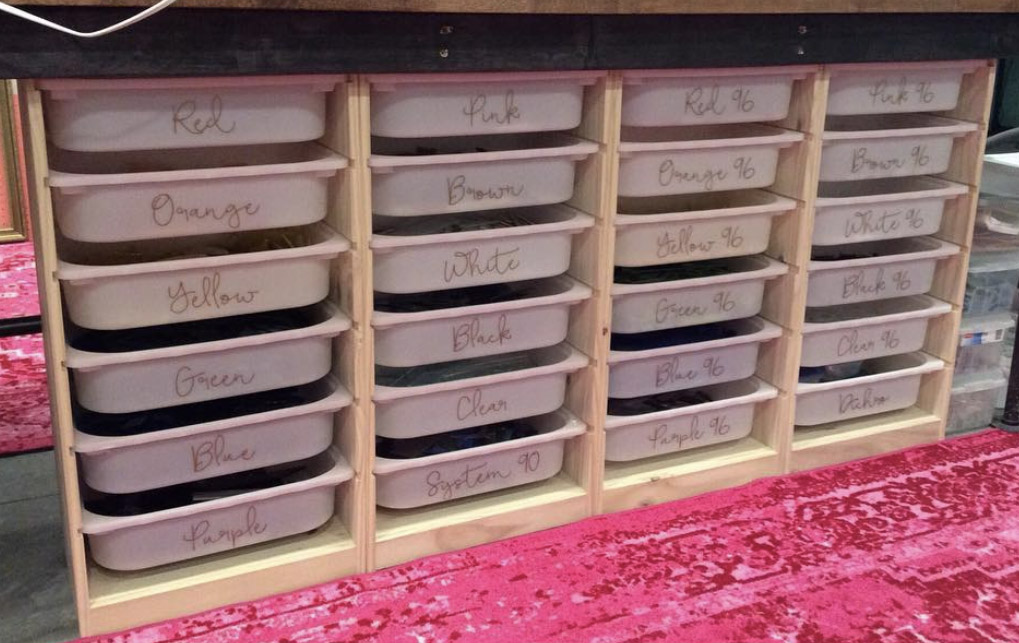
Each bin labeled with a metallic gold vinyl decal by color. A little flair goes a long way, even in your storage system.
The Color, Obviously
I had a specific mint green in my head. Not a paint chip mint. My mint. Particular and a little hard to explain. I couldn't find it ready-made, so I mixed two colors together until it felt right, then took it to Sherwin-Williams to get it matched. It's saved in my account now as Angie's Mint. My own personal shade of studio happiness, on file, just for me. I find this extremely satisfying.
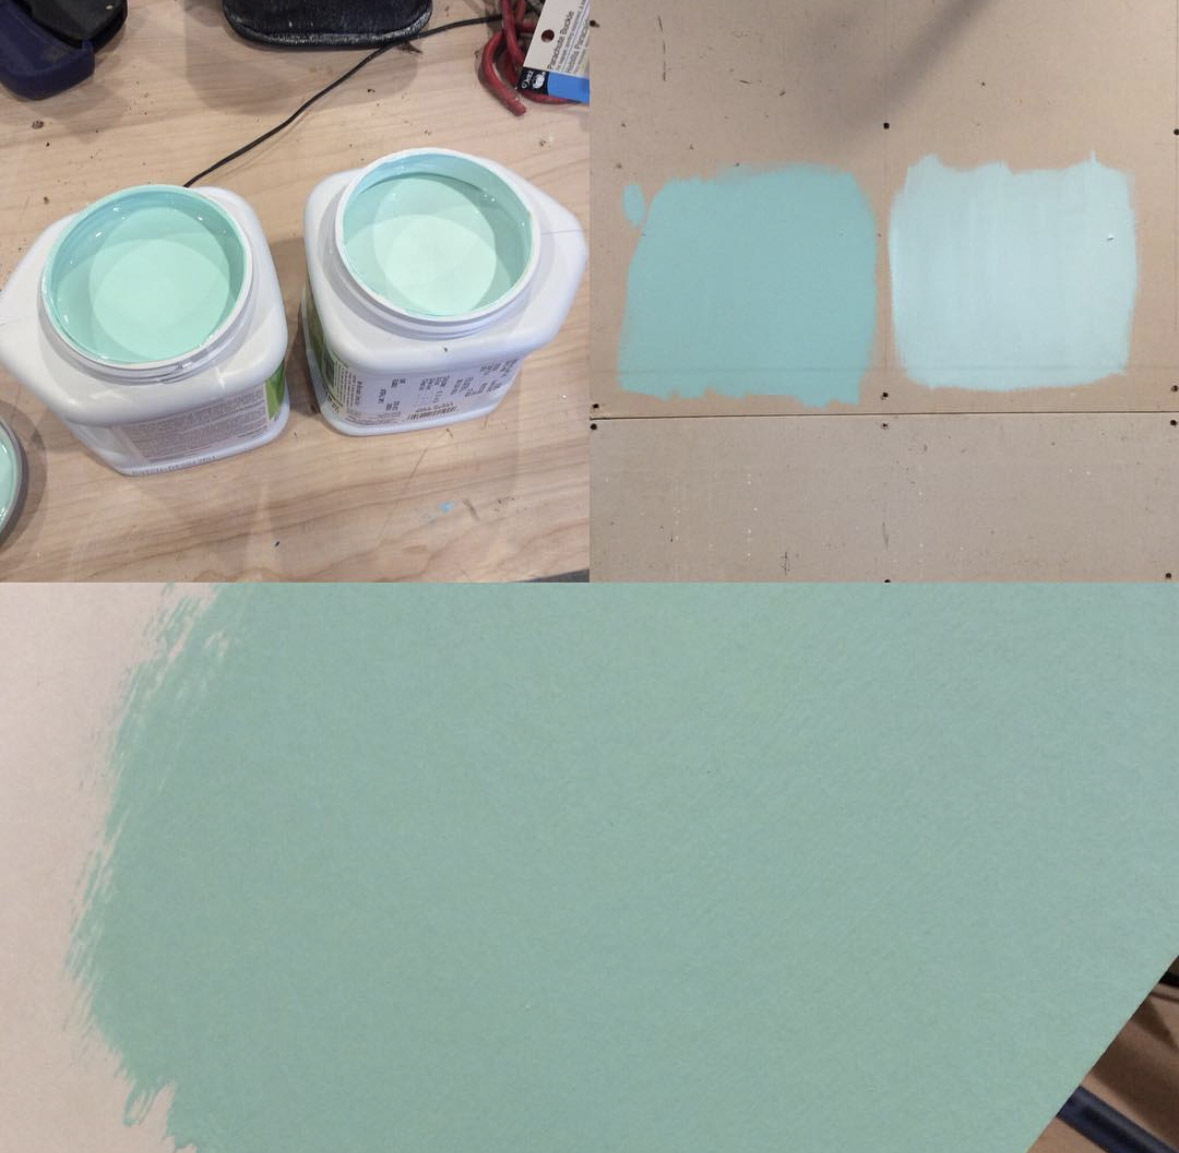
The two samples I tested on the wall. Neither one was quite right on its own. Half and half turned out to be exactly right.
I added metallic gold vinyl lettering on the walls, encouraging words and phrases, because sometimes you need a reminder mid-project that what you're doing is worth doing. And then came the rugs.
The rugs are aggressively pink. They're oversized, they're on the concrete floors, and they are not subtle. They also save my feet and my sanity during long studio days, so the pinkness is non-negotiable.

Kokomo approves. She claimed the rug in the house before it ever made it to the studio.
What It Actually Became
This space is practical, personal, and a little unconventional. The shelves are family. The color was invented. The rugs are a commitment.
A studio isn't just a room. It's permission to take your work seriously, to give your materials a real home, to have a place that says this is real, and so are you. Mine does all of that. And it has a really good view.
The finished studio. Angie's Mint, gold lettering, pink rugs, and all three kilns running.
Building your own creative workspace? I'd love to hear about it in the comments. And if you're a glass fuser looking for a smarter way to track your kiln projects, check out My Kiln Journal, a tool I built specifically for our weird and wonderful corner of the art world.